Appearance
Transformations
Graphs representation can change during the visualization: multiple nodes can be aggregated to a single node representation, same for links, or indirect relationships can be represented by a simple and direct relationship. In all these cases the graph can be transformed in another graph. Ogma provides multiple ways to alter the graph in any way described above with the Transformation API.
Basics
A transformation object is the outcome of any Ogma transformation operation: the object controls the state of the transformation, so that it is possible to toggle it, control its execution and destroy it.
js
const transformationObject = ogma.transformation.addNodeFilter( ... );

transformationObject
  .whenApplied()
  .then(() => {
    // here I am sure the trasformation is complete
  });

// ...later on
// turn off the transformation
transformationObject.disable();

// and turn it on again
transformationObject.enable();

// ...and now destroy it completely
transformationObject.destroy();
// from this moment on the transformationObject
// has no longer effect on the graph
Transformation are immediate in general, but it is possible to animate them during creation with the duration parameter:
js
// use filter here, but same apply to other transformation as well
const transformationObject = ogma.transformation.addNodeFilter({..., duration: 1000});

// same applies when disabling/destroying the transformation:
// ...later on
// turn off the transformation with animation
transformationObject.disable(1500);

// and turn it on again with animation
transformationObject.enable(1500);

// ...and now destroy it completely with animation
transformationObject.destroy(1500);
Transformations are run sequentially, you can see an example illustrating it here.
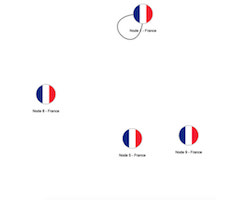
Filtering Transformation
Both nodes and edges can be dynamically filtered from the graph with a simple operation:
js
// Keep only the nodes with "country" is set to France
const nodeFilter = ogma.transformations.addNodeFilter(
  node => node.getData('country') === 'France'
);
js
// Keep only the edges which property "country" is set to "France"
const edgeFilter = ogma.transformations.addEdgeFilter(function (edge) {
  return edge.getData('country') === 'France';
});
Criteria used in the transformations above must return true for nodes/edges to show and false for nodes/edges to hide.
It is also possible to animate the filtering transformation:
js
const nodeFilter = ogma.transformations.addNodeFilter({
  duration: 500,
  criteria: node => node.getData('country') === 'France'
});

const edgeFilter = ogma.transformations.addEdgeFilter({
  duration: 500,
  criteria: edge => edge.getData('VISUALIZE') === 'graphs'
});
The logic inside the filtering criteria can be more complex than then just look at the node's or edge's data as follow:
js
// Keep only the edges where at least one end has the property "country" set to "France"
const edgeFilter = ogma.transformations.addEdgeFilter(edge => {
  return edge.getExtremities().getData('country').indexOf('France') > -1;
});
There's also a shorthand for addNodeFilter and addEdgeFilter on the ogma instance object as well:
js
const nodeFilter = ogma.transformations.addNodeFilter(
  node => node.getData('country') === 'France'
);

const edgeFilter = ogma.transformations.addEdgeFilter(
  edge => edge.getData('country') === 'France'
);
Group nodes transformation
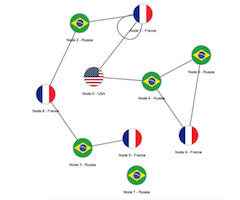
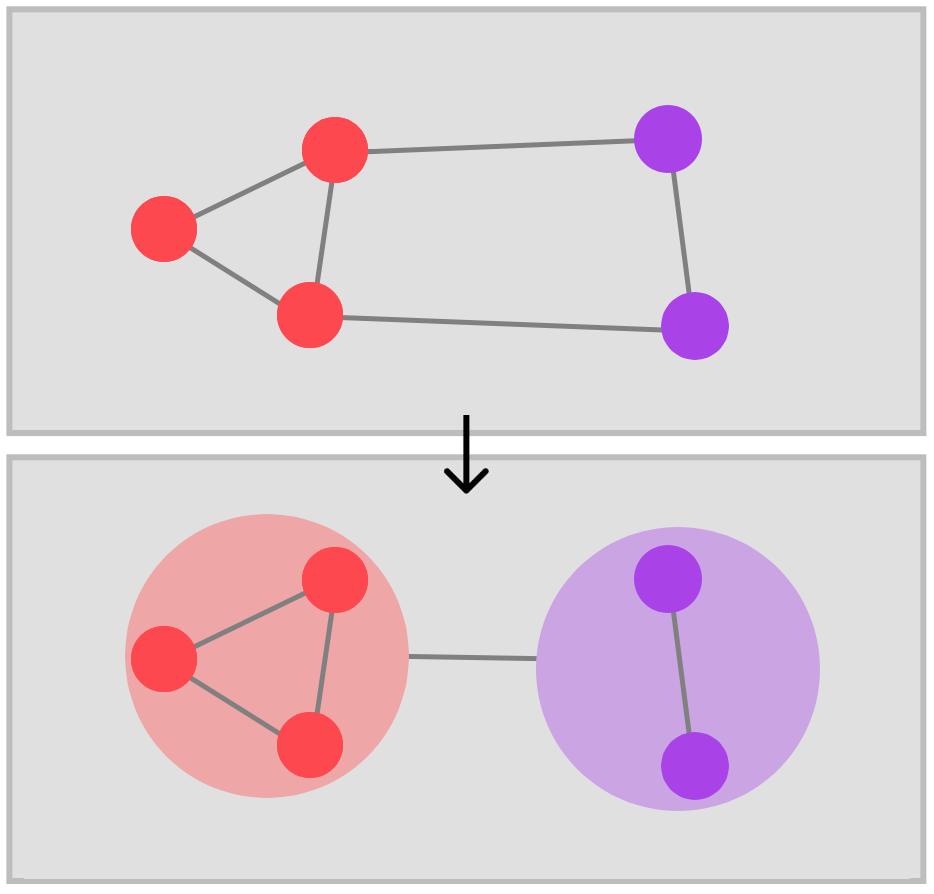
Nodes can be grouped together to simplify the visualization of the network: this transformation can group nodes according to a criteria, calculate compound properties at the group level and create a hierarchy of nested groups reducing the clutter in the visualization.
To group nodes, Ogma offers the addNodeGrouping function:
js
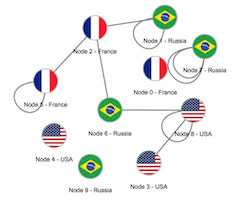
// group all the nodes that have a "country" property set to "France" in a single node
const nodeGrouping = ogma.transformations.addNodeGrouping({
  selector: node => node.getData('country') === 'France',
  nodeGenerator: nodeList => {
    return {
      id: 'grouped-french-node',
      attributes: {
        text: 'France Group',
        radius: nodeList.size * 2,
        image: 'url/for/french/flag.jpg'
      }
    };
  }
});
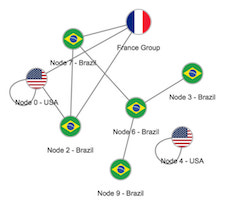
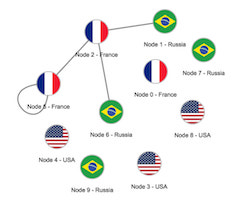
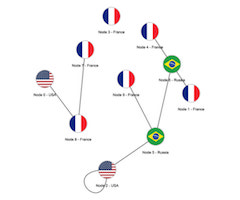
In the code above all nodes with country set to "France" are grouped together and the resulting node is styled with a custom label and size, with the image of the French flag using the nodeGenerator option property.
It is possible to ungroup the nodes disabling the transformation object or destroying it:
js
// ..later to undo/ungroup just use the transformation object
// Note: it can be restored again calling .enable()
nodeGrouping.disable();

// or remove it completely
nodeGrouping.destroy();
When ungrouping the nested nodes will get their original position, with an offset based on the grouped node current position.
It is possible to perform multiple grouping at the time using the groupIdFunction option to create different groups:
js
// Group all nodes by country. Nodes with no country information will be grouped into the "No Country" group
const multipleGroups = ogma.transformations.addNodeGrouping({
  groupIdFunction: node => node.getData('country') || 'No Country',
  nodeGenerator: (nodeList, groupId) => {
    return {
      id: 'custom-id-' + groupId,
      attributes: {
        text: groupId + ' Group',
        radius: nodeList.size * 2,
        image: getFlagIcon(groupId) // a simple function that returns the flag URL for each groupId value
      }
    };
  }
});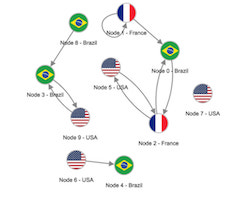

Note that in the last example selector is not specified, so all nodes in the graph are selected by default.
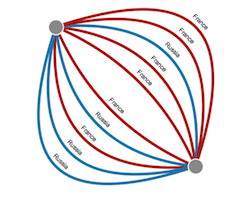
Sometimes it is useful to control how edges are grouped during the node grouping process: for example it can be of interest to group edges by direction for each connection. Ogma makes easy this task providing a specific separateEdgesByDirection flag:
js
// group all the nodes that have a "country" property set to "France" in a single node
const nodeGrouping = ogma.transformations.addNodeGrouping({
  selector: node => node.getData('country') === 'France',
  nodeGenerator: nodeList => {
    return {
      id: 'grouped-node-1',
      attributes: { image: 'url/for/french/flag.jpg' }
    };
  },
  separateEdgesByDirection: true,
  edgeGenerator: edgeList => {
    const combinedId = edgeList.getId().join('-');
    return { id: 'grouped-edge-' + combinedId, attributes: { shape: 'arrow' } };
  }
});
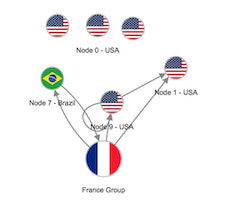
The edgeGenerator function works in a similar way to the nodeGenerator function explained before: edges that will be grouped are passed to the function as edgeList parameter.
To see and example of node grouping in action taken a look at:
For more control on the way to group edges read the next section.
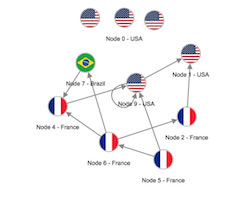
Visual grouping
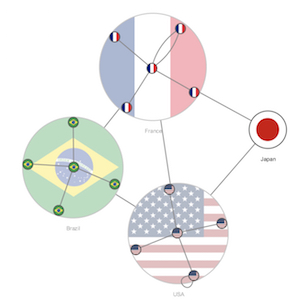
Additionally, Ogma offers a way to group nodes without hiding them. That can be very useful to work with the 'meta-graph' and arrange it in clusters, while still having access to the contents of the clusters. This mode is embedded into the usual node grouping by adding more fields to the grouping options.
In order to leave some of the groups open, you should specify it in the showContents callback, based on the group node and its contents:
js
const grouping = ogma.transformations.addNodeGrouping({
  groupIdFunction: node => node.getData('country') || 'No Country',
  showContents: metaNode => metaNode.getData('open'),
  nodeGenerator: nodeList => {
    return {
      id: 'grouped-node-1',
      attributes: { opacity: 0.32 },
      data: { open: nodeList.size > 5 }
    };
  }
});
Alternatively, if you can supply a boolean value to showContents field, if all of your compound nodes would be of one kind or another.
It is also possible to add more levels of grouping:
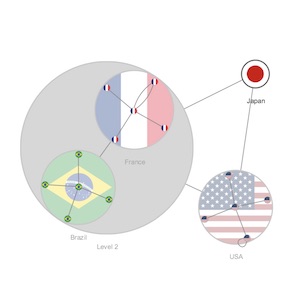
Another callback that can be useful in visual grouping is onCreated, which allows you to apply positioning to the contents of the group, i.e. run a layout or set pre-calculated positions. This callback should return a Promise if you want that the grouping transformation would wait until these procedures are finished for all the groups, so that you could interact with the compound nodes. For instance, run a layout on them.
js
const grouping = ogma.transformations.addNodeGrouping({
  groupIdFunction: node => node.getData("country") || "No Country",
  showContents: metaNode => metaNode.getData('open'),

  nodeGenerator: nodeList => {
    ...
  },

  onCreated: (metaNode, showContents, subNodes, subEdges) =>{
    if (showContents) {
      // return a Promise if you want transformation to wait until it's done
      return ogma.layouts.force({ nodes: subNodes }); // returns a Promise
    }
  }
});

// here we run the layout on the meta-nodes only
grouping.whenApplied()
  .then(() => ogma.layouts.force());
By default, all the layouts will ignore the nodes that are grouped. But, if you pass them to the layout explicitly, the layout would be applied on them. This can come in handy if you want to layout the contents of the particular group as if it was completely independent as a subgraph and see its shape. In the same way, you can apply different layouts to the contents of the different groups:
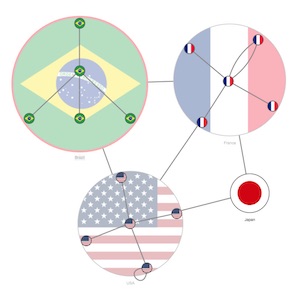
Examples of visual grouping in action:
Checkout our good practices tutorial with grouping
Group edges transformation
Like nodes there are cases where it makes sense to merge edges to simplify the visualization, in order to analyze high level flows in the network, and drill down where needed.

To group edges, Ogma offers the addEdgeGrouping function:
js
const edgeGenerator = ogma.transformations.addEdgeGrouping();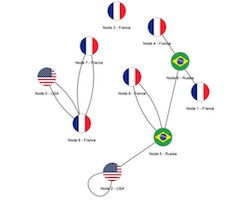
The code above group all parallel edges in the graph in a single edge. That is the basic usage of the API. Note edge grouping applies only for each set of parallel edges: it is not possible to group together edges with different ends.
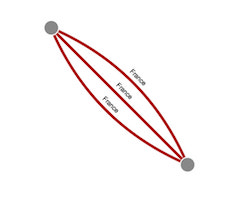
Of course it is possible to apply the transformation to a specific subset of the graph and better control the transformation behaviour:
js
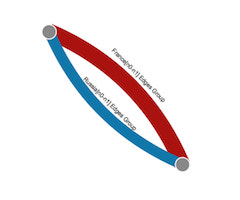
// group all the edges that have a "country" property set to "France"
const edgeGenerator = ogma.transformations.addEdgeGrouping({
  selector: edge => edge.getData('country') === 'France',
  generator: edgeList => {
    // the final width is the sum of all the widths of the edges grouped together
    const finalWidth = edgeList
      .getAttribute('width')
      .reduce((memo, width) => memo + width, 0);
    return {
      id: 'grouped-french-edge',
      attributes: {
        text: 'France Edges Group',
        width: finalWidth,
        color: 'rgb(178,18,18)'
      }
    };
  }
});
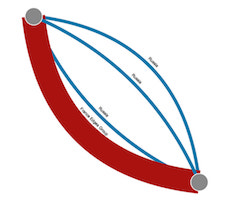
In the code above the edges between the two ends are filtered by some data property and the result is grouped together: a custom styling has been applied to the grouped edge using the generator option property.
As for nodes, also edge grouping can be undone disabling or destroying the transformation object:
js
// ..later to undo/ungroup just use the transformation object
edgeGenerator.disable();
// will be removed completely
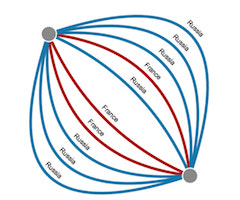
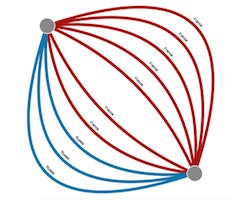
edgeGenerator.destroy();It is possible to perform multiple distinct grouping at the same time using the groupIdFunction option to create different groups:
js
// group parallel edges in multiple edges, each group by country
const edgeGenerator = ogma.transformations.addEdgeGrouping({
  groupIdFunction: edge => edge.getData('country'),
  generator: (edgeList, groupId) => {
    // the final width is the sum of all the widths of the edges grouped together
    const finalWidth = edgeList
      .getAttribute('width')
      .reduce((memo, width) => memo + width, 0);

    const COLORS = {
      France: 'rgb(178,18,18)',
      Russia: 'rgb(9, 113, 178)'
    };

    return {
      id: 'grouped-edge' + groupId,
      attributes: {
        text: groupId + ' Edges Group',
        width: finalWidth,
        color: COLORS[groupId.substring(0, 6)]
      }
    };
  }
});
To see and example of edge grouping in action take a look at:
Manipulating grouped nodes and eges
You can now delete grouped nodes and edges.
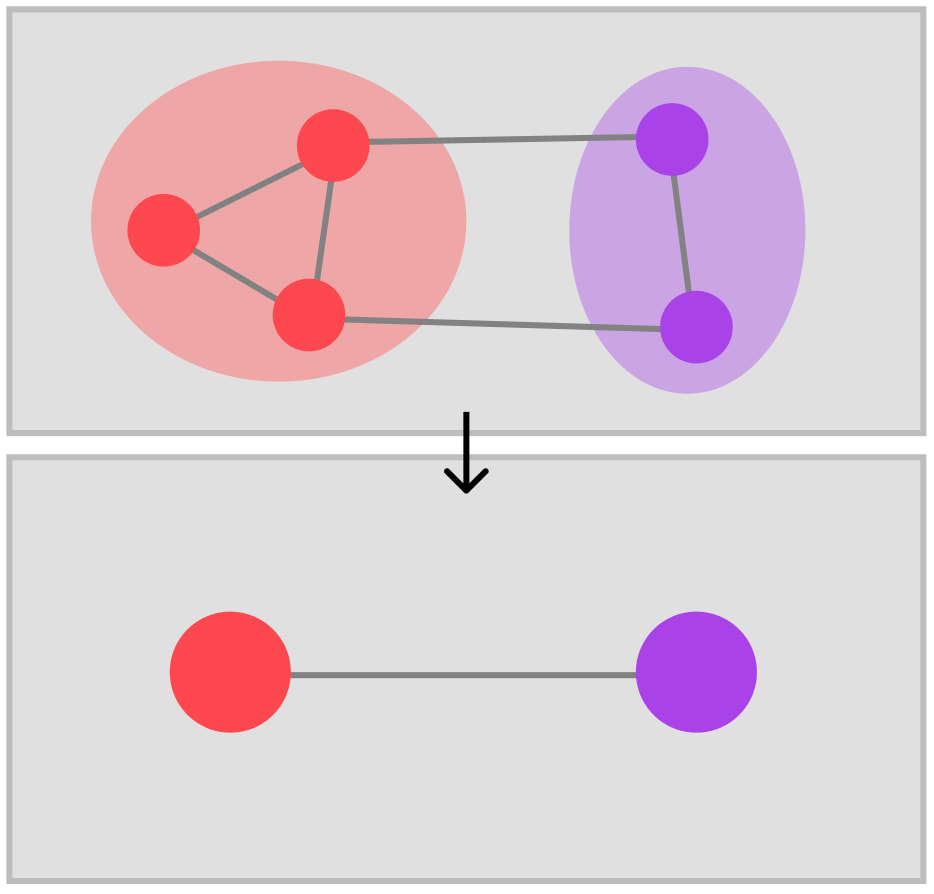
Node collapsing
Sometimes grouping nodes or edges is not enough, while a simplified data model is required to be computed live. This can be achieved by making "technical" nodes in a complex data model become new edges.
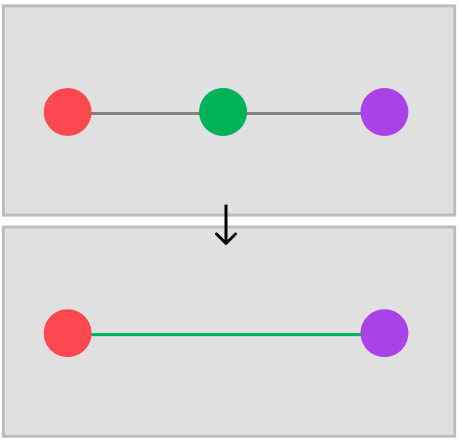
This type of transformation is called node collapsing in Ogma, and it can be used with the addNodeCollapsing API:
js
const nodeCollapsed = ogma.transformations.addNodeCollapsing({
  selector: function (node) {
    return node.getData('type') === 'country';
  }
});
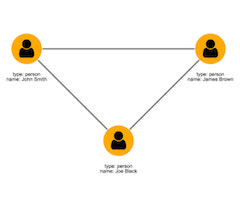
The function changes the data model of the network into a simpler one: the whole connectivity remains intact as nodes connected with the collapsed one will be connected each other with a many to many approach.
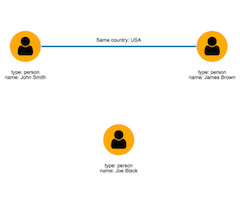
It is possible to control the styling of the new edge generated via the edgeGenerator parameter:
js
const nodeCollapsed = ogma.transformations.addNodeCollapsing({
  selector: function (node) {
    return node.getData('type') === 'country';
  },
  edgeGenerator: function (
    hiddenNode,
    sourceNode,
    targetNode,
    sourceEdges,
    targetEdges
  ) {
    return {
      attributes: {
        color: 'rgb(9, 113, 178)',
        text: 'Same country: ' + hiddenNode.getData('name')
      }
    };
  }
});
Custom attributes and data can be generated using information from the collapsing node neighborhood, using the parameters of the edgeGenerator function.
It is also possible to prevent the creation of one or more edges during the process:
js
const nodeCollapsed = ogma.transformations.addNodeCollapsing({
  selector: function (node) {
    return node.getData('type') === 'country';
  },
  edgeGenerator: function (
    hiddenNode,
    sourceNode,
    targetNode,
    sourceEdges,
    targetEdges
  ) {
    // check if one of the two ends is "Joe Black"
    const isJoeBlack =
      sourceNode.getData('name') === 'Joe Black' ||
      targetNode.getData('name') === 'Joe Black';

    // do not create the links with Joe Black
    if (isJoeBlack) {
      return null;
    }

    return {
      attributes: {
        color: 'rgb(9, 113, 178)',
        text: 'Same country: ' + hiddenNode.getData('name')
      }
    };
  }
});
As other transformation API also nodeCollapsing can be animated:
js
const nodeCollapsed = ogma.transformations.addNodeCollapsing({
  selector: function (node) {
    return node.getData('type') === 'country';
  },
  duration: 1500
});
To see and example of node collapsing in action taken a look at:
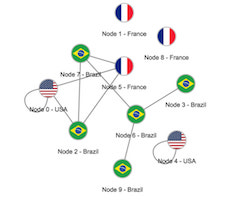
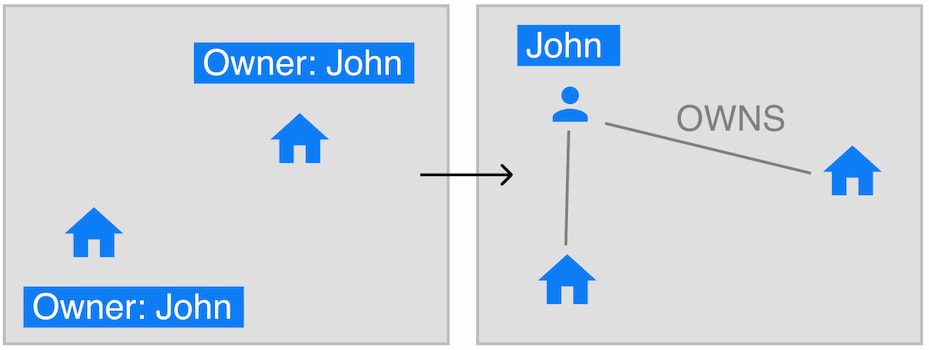
Neighbor merging
Often the data model for the presentation doesn't match the one from the database or storage. This can translate in a simplified data model with the same connectivity as in node collapsing, or in a different model where particular entities are transformed in attributes of their neighbors.
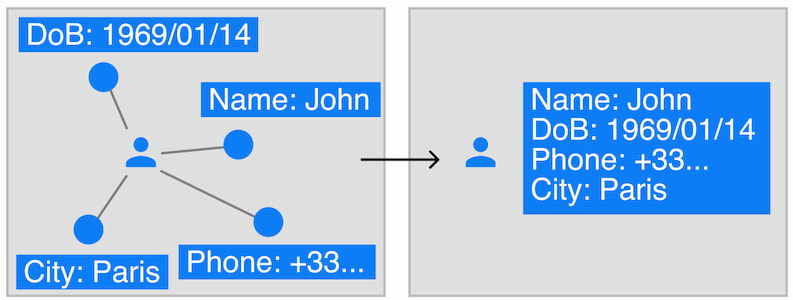
In Ogma this kind of transformation is implemented via the addNeighborMerging API:
js
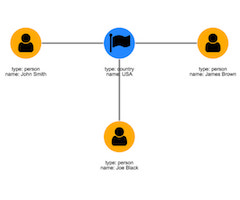
const neighborMerge = ogma.transformations.addNeighborMerging({
  selector: function (node) {
    return node.getData('type') === 'country';
  },
  dataFunction: function (node) {
    // this is the data from the node about to hide
    // that will enrich the neighborhood data
    return { country: node.getData('name') };
  }
});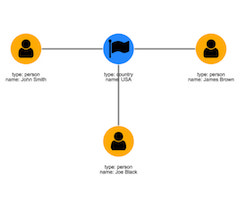
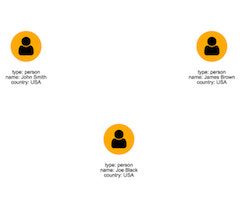
The dataFunction parameter can be used to enrich the data of the neighborhood around the merged node. In some scenarios there's no need to enrich the neighborhood with data, so undefined can be returned from the function.
Note the 3 person node now acquired a new property country set to USA after the merging. A single node information has been merged into its neighborhood.
Note if the dataFunction parameter is not passed the default behaviour is to not enrich the neighborhood - same as returning undefined in your function. It is therefore recommended to always pass a dataFunction parameter.
To see and example of neighbor merging in action taken a look at:
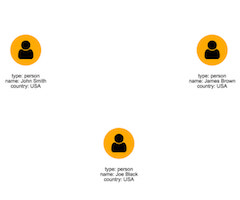
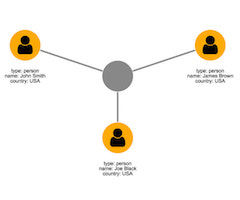
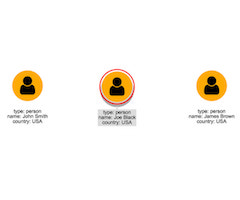
Neighbor generation
On the other side of the spectrum, generating new entities from the data model can be a way to promote inner properties and make new patterns emerge in the analysis.
In Ogma this kind of transformation is implemented via the addNeighborGeneration API:
js
const neighborMerge = ogma.transformations.addNeighborGeneration({
  selector: function (node) {
    return node.getData('type') === 'person';
  },
  neighborIdFunction: function (node) {
    return node.getData('country');
  }
});
The neighbourIdFunction tells Ogma what id to assign to the newer node generated. When a single string is returned then a single node is generated. It is possible to avoid the generation of a node returning null. At the same time it is possible to generate multiple neighbours returning an array of strings:
js
const neighborMerge = ogma.transformations.addNeighborGeneration({
  selector: node => node.getData('type') === 'person',
  neighborIdFunction: node => [node.getData('country'), node.getData('type')]
});

The addNeighborGeneration function provides an API to control the styling of both newly generated nodes and their relative edges:
js
const neighborMerge = ogma.transformations.addNeighborGeneration({
  selector: node => node.getData('type') === 'person',
  neighborIdFunction: node => node.getData('country'),
  nodeGenerator: (id, sourceNodeList) => {
    // Style the new node with a blue background and a flag icon
    return {
      attributes: {
        color: 'rgb(9, 113, 178)',
        icon: {
          content: '\uf024',
          font: 'FontAwesome'
        }
      }
    };
  },
  edgeGenerator: (sourceNode, newNode) => {
    // make the new edges blue
    return {
      attributes: {
        color: 'rgb(9, 113, 178)'
      }
    };
  }
});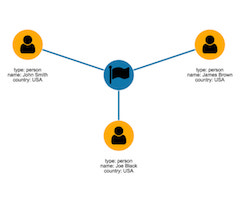
The edgeGeneration function is called for each edge generated and it provides contextual information useful for the creation of the edge. The nodeGenerator will be called for each new node generated, providing contextual information of the neighborhood that created the new node.
To see and example of neighbor generation in action taken a look at: